test_heat_map
1 Basic Functionality
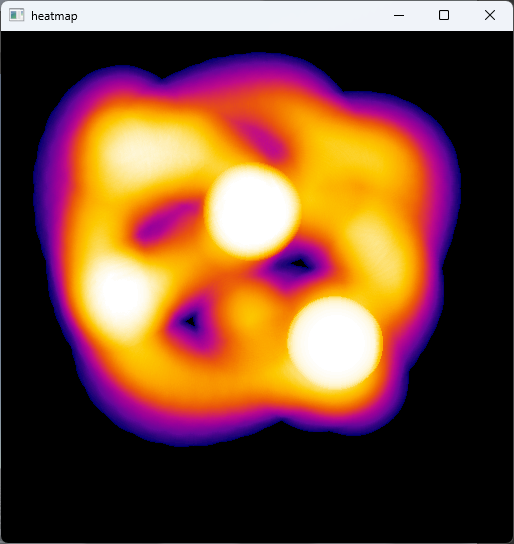
Display interactive heatmap
2 Implementation Process
2.1 Initialize Environment
env = RFUniverseBaseEnv()

camera = env.InstanceObject(name="Camera", attr_type=attr.CameraAttr)
camera.SetTransform(position=[-0.1, 0.033, 0.014], rotation=[0, 90, 0])
target = env.InstanceObject(name="Rigidbody_Sphere", attr_type=attr.RigidbodyAttr)
target.SetDrag(2)
target.EnabledMouseDrag(True)
target.SetUseGravity(False)
target.SetTransform(position=[0, 0.05, 0.015], scale=[0.01, 0.01, 0.01])
env.step()
env.AlignCamera(camera.id)
First, initialize the camera and object
SetDragsets the drag force with the givendragparameterEnabledMouseDrag(True)enables the function to drag the object with the left mouse buttonSetUseGravity(False)turns off the gravity effect on the objectAlignCameraaligns the GUI’s view with the given camera
2.2 Display Interactive Heatmap
env.SendLog("Click the End Pend button to start heat map record")
env.Pend()
camera.StartHeatMapRecord([target.id])
env.SendLog("Drag the sphere to generate heat map")
env.SendLog("Click the End Pend button to end heat map record")
env.Pend()
camera.EndHeatMapRecord()
camera.GetHeatMap()
env.step()
print(camera.data["heat_map"])
image_np = np.frombuffer(camera.data["heat_map"], dtype=np.uint8)
image_np = cv2.imdecode(image_np, cv2.IMREAD_COLOR)
print(image_np.shape)
env.close()
cv2.imshow("heatmap", image_np)
cv2.waitKey(0)
Click the End Pend button to start recording the heatmap, during which you can freely drag the sphere
Click the End Pend button again to stop the heatmap recording, after which the program will display the generated heatmap on the screen using cv2