test_active_depth.py
1. Basic Functionality
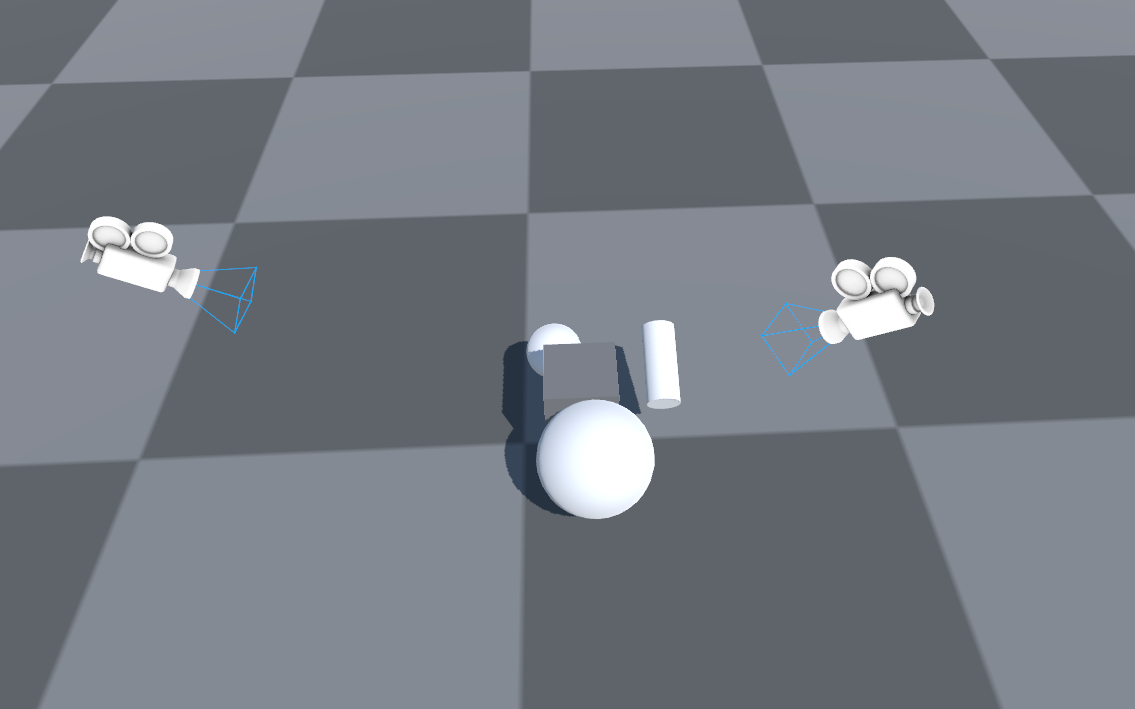
With known camera intrinsic and extrinsic parameters, obtain both the infrared depth map and the real depth map of an object, convert them into point clouds, and visualize the results.
2. Implementation Process
2.1 Initialize the Environment
nd_main_intrinsic_matrix = np.array([[600, 0, 240],
                                     [0, 600, 240],
                                     [0, 0, 1]])
nd_ir_intrinsic_matrix = np.array([[480, 0, 240],
                                   [0, 480, 240],
                                   [0, 0, 1]])

env = RFUniverseBaseEnv(scene_file="ActiveDepth.json", ext_attr=[ActiveLightSensorAttr])
active_light_sensor_1 = env.GetAttr(789789)
Load the environment from a json file.
Initialize the camera intrinsic matrices.
Here, $f_x, f_y$ are equal, representing an ideal pinhole camera scenario.
2.2 Obtain Images
2.2.1 Obtain RGB Image
active_light_sensor_1.GetRGB(intrinsic_matrix=nd_main_intrinsic_matrix)
env.step()
image_byte = active_light_sensor_1.data["rgb"]
image_rgb = np.frombuffer(image_byte, dtype=np.uint8)
image_rgb = cv2.imdecode(image_rgb, cv2.IMREAD_COLOR)
image_rgb = cv2.cvtColor(image_rgb, cv2.COLOR_BGR2RGB)
2.2.2 Obtain Object Semantic Segmentation Map
active_light_sensor_1.GetID(intrinsic_matrix=nd_main_intrinsic_matrix)
env.step()
image_id = active_light_sensor_1.data["id_map"]
image_id = np.frombuffer(image_id, dtype=np.uint8)
image_id = cv2.imdecode(image_id, cv2.IMREAD_COLOR)
image_id = cv2.cvtColor(image_id, cv2.COLOR_BGR2RGB)
2.2.3 Obtain Depth Map
active_light_sensor_1.GetDepthEXR(intrinsic_matrix=nd_main_intrinsic_matrix)
env.step()
image_depth_exr = active_light_sensor_1.data["depth_exr"]

active_light_sensor_1.GetActiveDepth(
    main_intrinsic_matrix_local=nd_main_intrinsic_matrix,
    ir_intrinsic_matrix_local=nd_ir_intrinsic_matrix,
)
env.step()
image_active_depth = active_light_sensor_1.data["active_depth"]
GetDepthEXRreturns the depth map in EXR format, considered to be without error.GetActiveDepthsimulates a real-world infrared depth camera, returning a depth map with errors.
2.3 Point Cloud Rendering
2.3.1 Obtain the Camera’s Extrinsic Matrix
local_to_world_matrix = active_light_sensor_1.data["local_to_world_matrix"]
local_to_world_matrix: The coordinate transformation matrix from camera local to world coordinate system, i.e., the camera’s extrinsic matrix.
2.3.2 Render Point Cloud Using the Error-Free Depth Map
real_point_cloud1 = dp.image_bytes_to_point_cloud_intrinsic_matrix(
    image_byte, image_depth_exr, nd_main_intrinsic_matrix, local_to_world_matrix
)
image_bytes_to_point_cloud_intrinsic_matrix: Generates a global coordinate system point cloud using the original byte-format RGB and depth images, along with the camera’s intrinsic and extrinsic matrices.
2.3.3 Render Point Cloud Using the Depth Map with Errors
active_point_cloud1 = dp.image_array_to_point_cloud_intrinsic_matrix(
    image_rgb, image_active_depth, nd_main_intrinsic_matrix, local_to_world_matrix
)
image_array_to_point_cloud_intrinsic_matrix: Generates a global coordinate system point cloud using numpy.ndarray-format RGB and depth images, along with the camera’s intrinsic and extrinsic matrices.
2.3.4 Segment Objects in the Point Cloud
color = utility.EncodeIDAsColor(568451)[0:3]
mask_real_point_cloud1 = dp.mask_point_cloud_with_id_color(
    real_point_cloud1, image_id, color
)
mask_active_point_cloud1 = dp.mask_point_cloud_with_id_color(
    active_point_cloud1, image_id, color
)
mask_point_cloud_with_id_color: Uses the previously generated object semantic segmentation map to segment target objects from the point cloud.
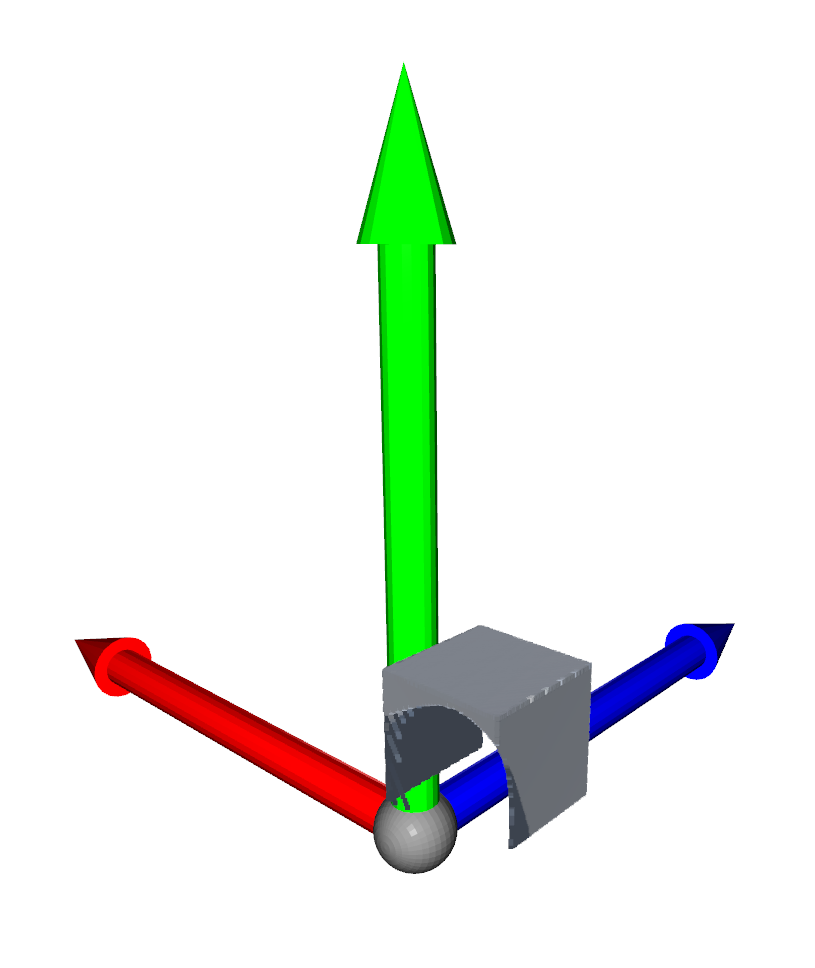
2.3.5 Filter the Point Cloud with Errors for Improvement
filtered_point_cloud1 = dp.filter_active_depth_point_cloud_with_exact_depth_point_cloud(
    mask_active_point_cloud1, mask_real_point_cloud1
)
filter_active_depth_point_cloud_with_exact_depth_point_cloud: Uses the real depth map to filter and improve the point cloud generated from the depth map with errors.
2.3.6 Repeat the Process for Another Viewpoint Camera
active_light_sensor_2 = env.GetAttr(123123)

# Repeat the image capture and point cloud rendering steps for the second camera
# Finalize and close the environment
env.Pend()
env.close()
Repeat the above process for another viewpoint camera.
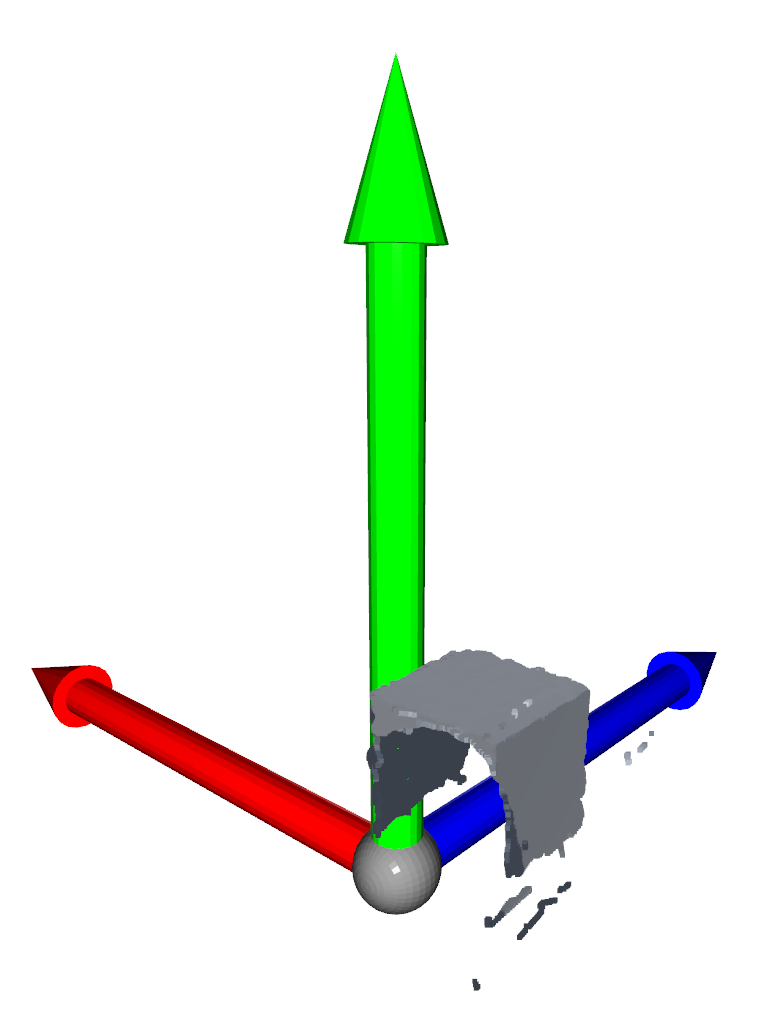
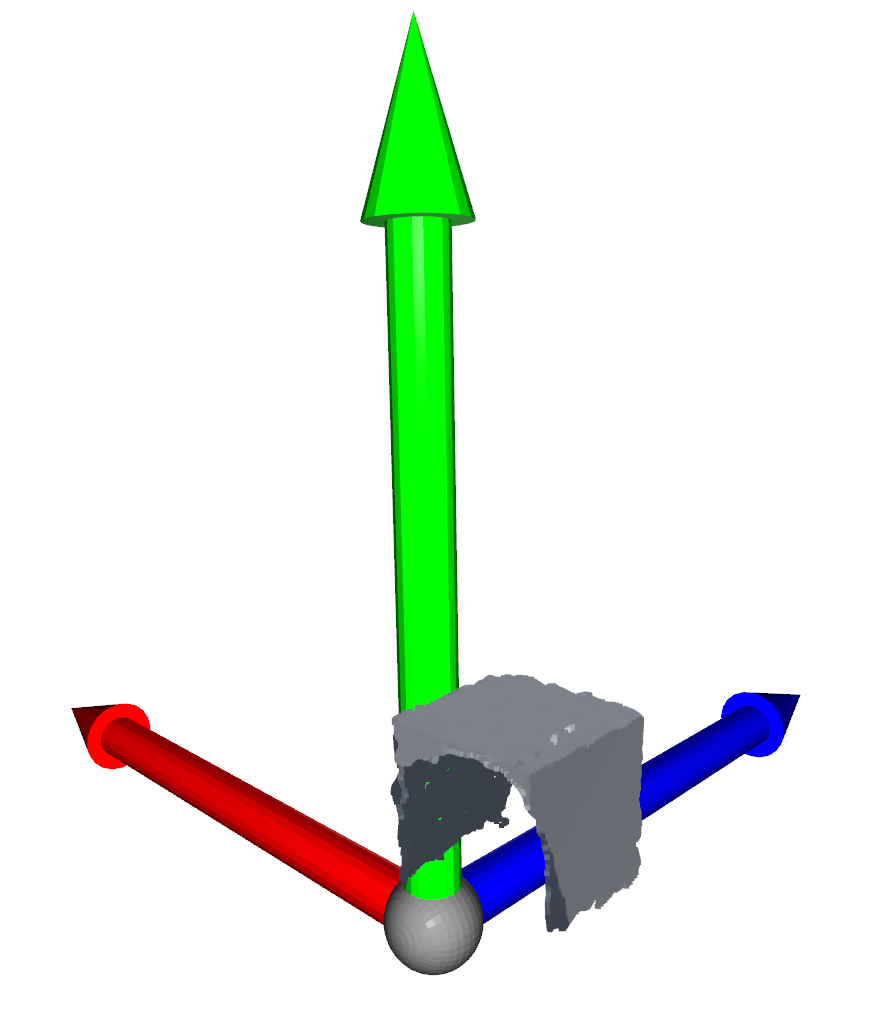
2.4 Visualization
# Transform from unity space to open3d space and display
# Apply transformations and visualize the different point clouds
coordinate = o3d.geometry.TriangleMesh.create_coordinate_frame()
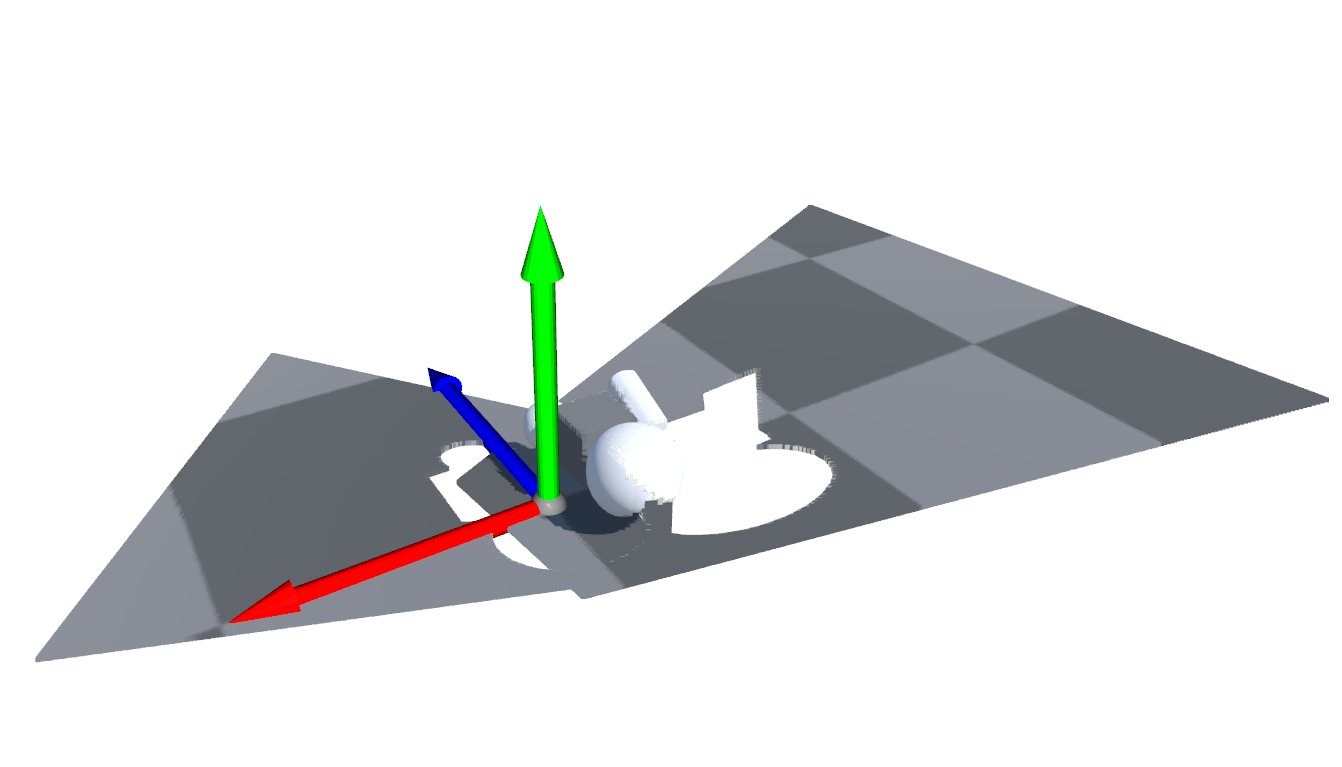
o3d.visualization.draw_geometries([real_point_cloud1, real_point_cloud2, coordinate])
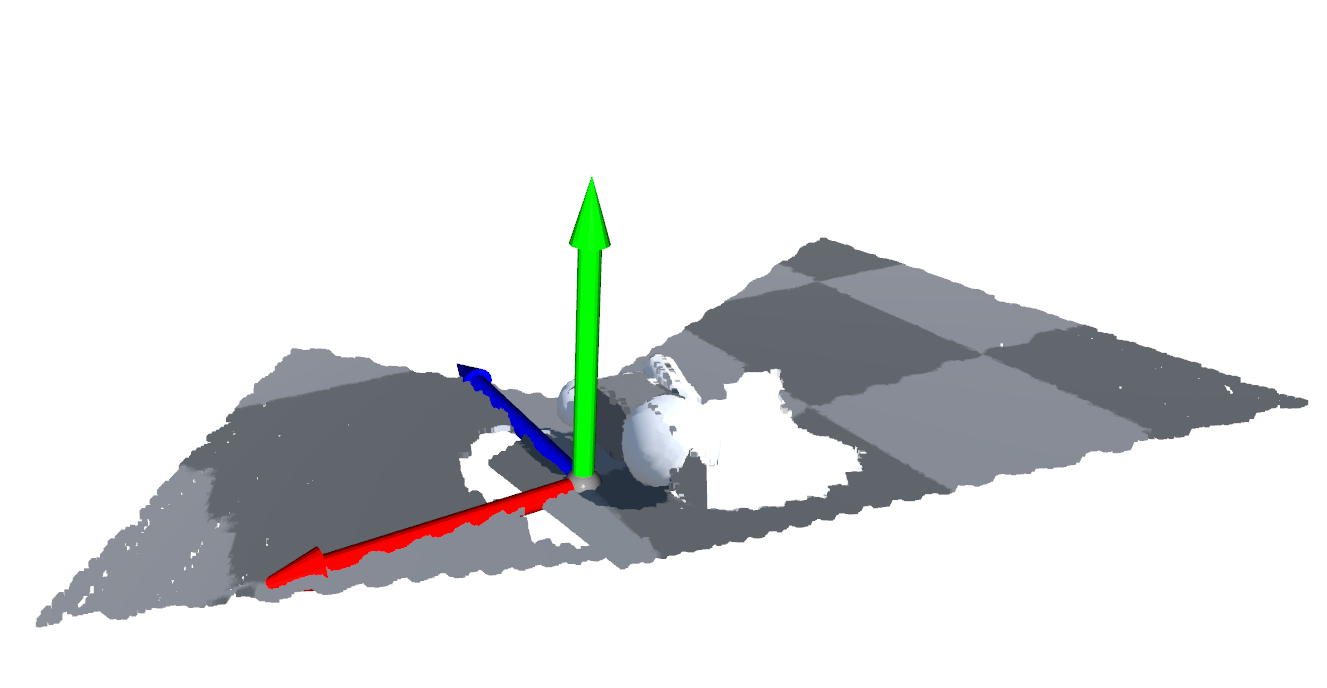
o3d.visualization.draw_geometries([active_point_cloud1, active_point_cloud2, coordinate])
o3d.visualization.draw_geometries([mask_real_point_cloud1, mask_real_point_cloud2, coordinate])
o3d.visualization.draw_geometries([mask_active_point_cloud1, mask_active_point_cloud2, coordinate])
o3d.visualization.draw_geometries([filtered_point_cloud1, filtered_point_cloud2, coordinate])
This tutorial segment demonstrates the process to obtain and visualize depth maps and point clouds, highlighting the capabilities of the pyrfuniverse simulation platform in handling infrared depth and realistic visualization.